
Search engine optimization is moving more and more toward user intent than keyword usage with each passing year. More and more websites get penalized for keyword stuffing thin, low-quality content with each new change to Google’s algorithm. If you want to rank today and beyond, you need to work toward becoming an authoritative voice in your niche. The most effective way to accomplish this is to target keywords users search for to solve specific problems in your niche and build valuable, high-quality content around those keywords.
Unfortunately, a lot more goes into SEO than finding keywords to target and producing content. You need to make sure Google can actually index and crawl your site, use titles and descriptions optimized for Google’s search results, utilize primary and related keywords properly, optimize the performance of your site, and more.
Fortunately, if you’re using WordPress, there’s a solution that can help you implement all of this. Its name is Yoast SEO.
WordPress SEO: How to Rank in Google
SEO has gone through a lot of changes since the first search engines emerged in the ‘90s. While keyword stuffing 500-word blog posts worked in the early 2000’s, it’s not going to work today. According to Rand Fishkin of Moz, there are a few specific things your website needs in order to rank in this day and age.
Again, this starts with having accessible URLs Google’s bots can crawl and index. Google Search goes through a process of crawling websites, indexing their pages and serving the ones it deems worthy. If Googlebot, Google’s search engine bot, can’t find your web pages, it can’t index them, and if it can’t index them, it can’t serve them in search results.
One other important component Rand mentions several times is targeting the right keywords and targeting them in the right way. Think about what you’re doing when you conduct a new Google search (or whichever search engine you use). You’re using a specific keyword or phrase in search of a website that has a solution to a problem you’re having. This means once you find a primary keyword and several related keywords to target, your next step should be to write a high-quality blog post that solves the problem behind that keyword.
Using Keywords Properly
In the past, you’d take that primary keyword and its related keywords and create a different page targeting each one. Today, it’s best to build one, long-form, highly valuable page that targets that primary keyword, and maybe even one to two synonyms, and uses the related keywords to complete the post. This mainly means using them for H3 headings and specific sections.
You should also focus on placing your primary keyword in specific areas, such as your post title, headings, title tag and meta description (more on this later). You should also try to keep the keyword density for your primary keyword between 0.5 and 1%.
If you need more help on learning how to optimize WordPress SEO outside of Yoast, check out an article we published called The SEO Settings Every New Blog Needs.
About Yoast SEO

So, now that you know the basics of what your site and content need to rank, let’s see how the Yoast SEO WordPress plugin can help you accomplish that. Yoast SEO is one of the top two SEO plugins available for WordPress. The other plugin goes by the name of All in One SEO, which we use here at ThemeTrust. Yoast has been downloaded over 40 million times and is actively used by over 7 million websites. It comes in free and premium versions, and its free version currently has 4.9 out of 5 stars. This rating was generated from over 20,000 reviews.
As for how the plugin came to be, Yoast was founded by Joost de Valk in 2010. Prior to building what became WordPress’ premier WordPress SEO plugin, Joost gained experienced in IT and coding and worked as an SEO consultant for years. Today, it’s powered by a team of developers, designers and marketers and even sponsors WordCamps (WordPress conventions) as a way to give back to the community.
Features
Let’s briefly go over Yoast SEO’s top features to explain how it can help you optimize your site for search engines. I’m going to focus on the free version in this section. I’ll mention premium features throughout this post and more so in the Pricing section.
- XML Sitemap – XML Sitemaps aren’t necessarily required for SEO, but they can help Google find the most essential pages on your site. Typically, Google will follow the internal links on your site to find its most essential pages, and you should work on your site’s internal link structure. A sitemap makes this process much simpler, and Yoast can generate one for you.
- Title Tags & Meta Descriptions – You know the title and page excerpt you see in Google’s search results? What you’re seeing are title tags and meta descriptions. Yoast allows you to set title tags and meta descriptions for posts to change the way they appear in search engines. These are different from the titles and excerpts you’ll see on your posts page.
- Snippet Previews – As you edit a post’s title tag and meta description, Yoast displays a snippet preview that allows you to see how it’ll look in search engines.
- SEO Analysis – Knowing whether or not you’re using your primary keyword correctly can be difficult. Fortunately, Yoast comes with an SEO analyzer that allows you to input your keyword and have the tool analyze your content to grade your use of it.
- Content Analysis – Labelled “Readability” in Yoast, this tool analyzes your content to determine how difficult it is to read. Readability isn’t a direct ranking factor, but it can contribute to your site’s bounce rate. If too many visitors find your content hard to read, they’ll leave, which indirectly tells Google something is wrong with your content. There is, however, debate on whether or not optimizing for readability is necessary.
- Internal Link Analysis – Your internal link structure can help you direct Google’s crawlers toward content you want to rank more than others. Yoast comes with an analysis tool that helps you optimize your internal link structure.
- Cornerstone Content Label – Cornerstone content is a dormant but growing SEO strategy. You essentially find three to five primary keywords you want your entire site to rank for and build long-form (10,000+ words) pages for them. This strategy relies on a strong internal link structure as you can help your site rank for these keywords by sending Google’s crawlers to your cornerstone pages. Yoast allows you to label specific content as cornerstone content and helps you optimize your internal link structure accordingly.
- Integration with Google Search Console – 404 and other errors can inhibit Google’s ability to crawl your site. Google Search Console is a tool you can use to stay on top of crawl errors and fix them as they occur. Yoast has a feature you can use to integrate your site with Google Search Console.
- User Roles – The Content and SEO Analysis tools are great for bloggers, but you probably don’t want your writers having the ability to edit Yoast SEO’s site-wide settings. Control who has access to what with Yoast’s user role management feature.
Let’s switch gears and go over how to set up and use Yoast SEO.
Installation & Configuration
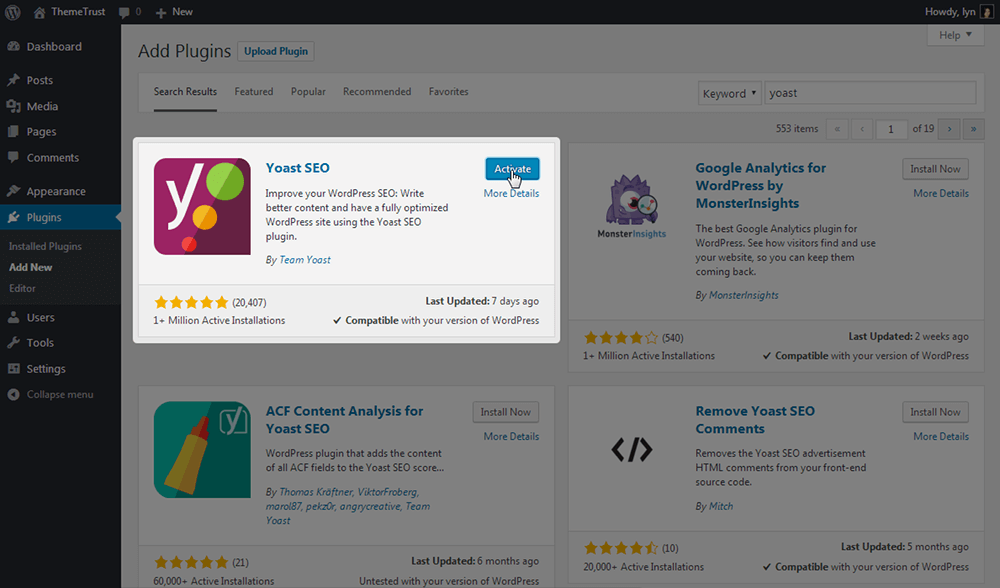
Yoast SEO is available in the WordPress plugin repository, so just head to the Add New Plugin page inside the WordPress admin area, search for it, install it, and activate it.
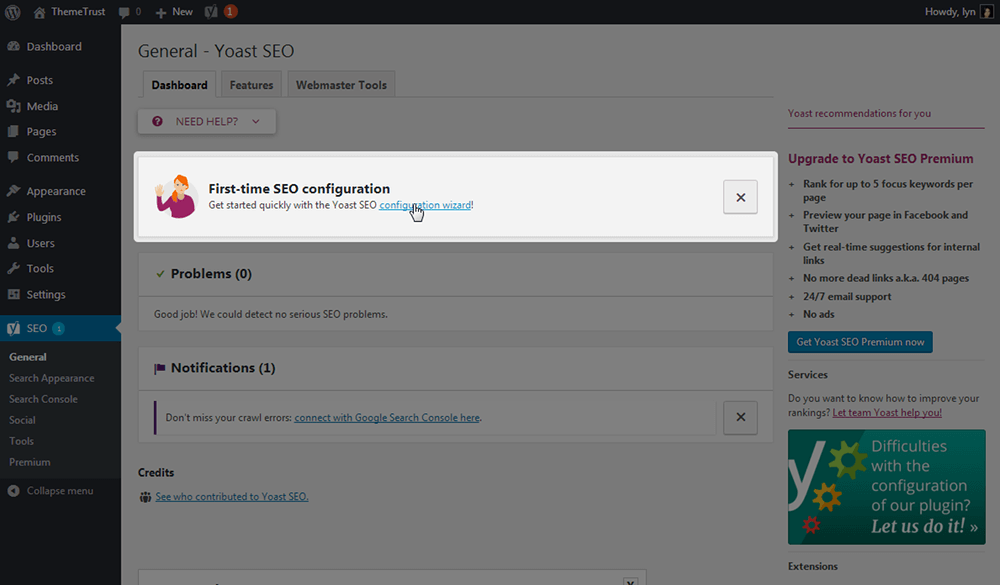
Head straight to the General settings page inside of Yoast, and click the button that leads to the configuration wizard. This tool isn’t necessary, but it streamlines the configuration process.
Click the Configure Yoast SEO button on the first page of the configuration wizard. The second page is simple. Choose Option A if your site is live and ready to be crawled by Google. Choose Option B if you’re still working on things. Classify your site on the third page. Choose whether a company (your business of more than one person) or an individual person (yourself) is behind the website on the fourth page.
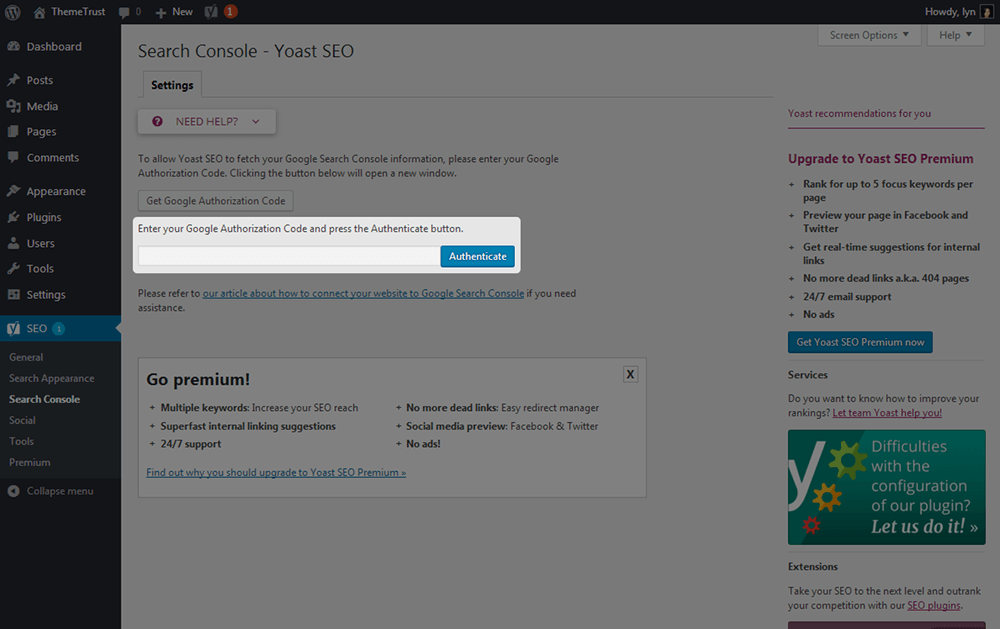
Insert all social media accounts relevant to your site on the fifth page. The sixth page should be left alone as it’s best to allow posts and pages to rank in Google. The seventh page asks whether or not your site will have multiple authors so the plugin can disable author archives to avoid duplicate content. If you plan on allowing other people have accounts and publish posts on your site, choose Yes. The eighth page is where you’ll enter your Authorization code for Google Search Console. You’ll need to create a Google Search Console account and connect your site to it by adding it as a property first. You can skip this part if you’re not ready to do this, yet. If so, you can input your Authorization code later on by going to SEO → Search Console.
The ninth page allows you choose the character that separates the title from your site name in browser tabs. If you look at the browser tab for this very blog post, you’ll see we use the “|” separator here at ThemeTrust.
Feel free to skip through the last few pages. They feature a sign-up form for Yoast’s newsletter, which I do recommend subscribing to stay up to date with the plugin, and links to articles/videos filled with helpful tutorials. You can read through these pages on your own, but they aren’t necessary for the configuration process.
Additional Settings
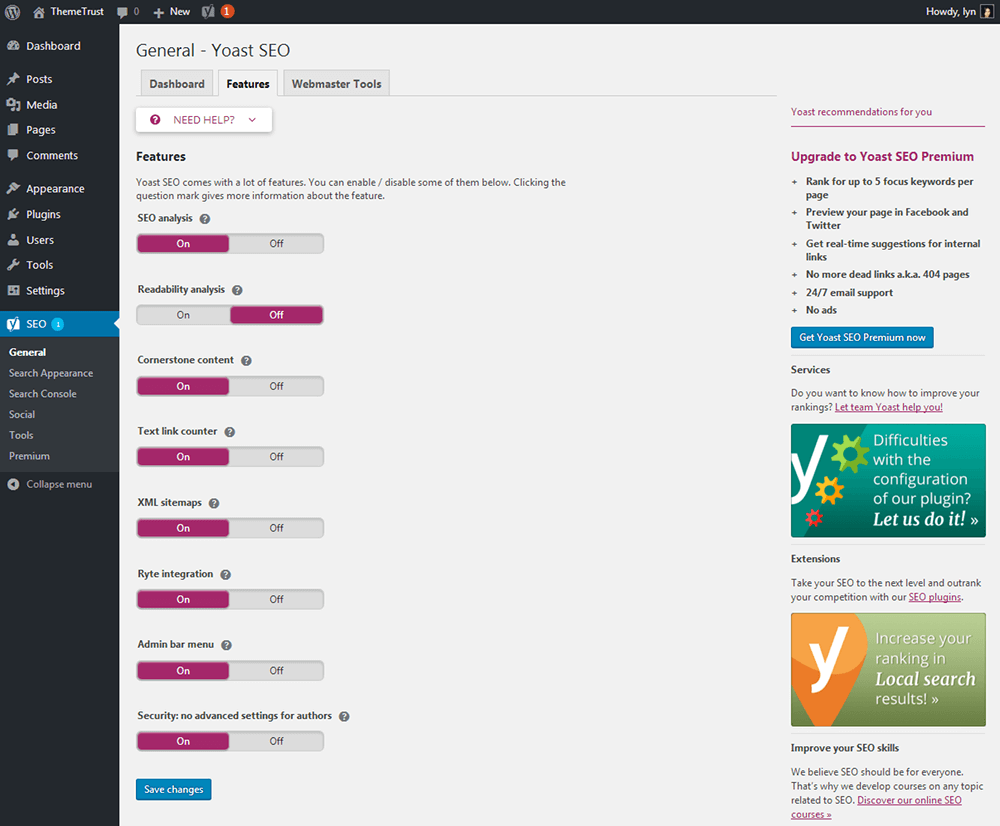
The configuration wizard covers the basics, but it doesn’t cover everything. Let’s briefly touch base on a few additional settings you should take a look at. First, head to SEO → General → Features. You can disable individual features on this page. For example, I don’t use the Readability tool, so I disable it to avoid receiving readability grades for my content. You can also see the XML Sitemaps setting is enabled by default. Simply installing Yoast generates a sitemap for your site. You can view it by navigating to yourdomain.com/sitemap_index.xml. Make sure you save your changes before leaving this page.
You can submit your sitemap to Google by logging into Google Search Console, viewing your property, going to Crawls → Sitemaps, and clicking the Add/Test Sitemap button. Enter “sitemap_index.xml” in the textbox that appears since this is the sitemap path Yoast uses. Click Submit to submit your sitemap. Next, go to SEO → Search Appearance → General, and add a meta description that briefly describes your entire site.
That covers the basics for setting up this plugin. Feel free to dive deep into the settings. That’s not the purpose of this post, so I’m going to move on.
How to Use Yoast SEO
I added and formatted a full blog post (2,000+ words) on my test website and added my focus keyword in the Yoast SEO box that appears at the bottom of the post. You can also see my Readability and SEO scores to the right. You’ll receive a red light if a lot of improvements are needed, an orange light when a few things need to be changed and a green light when you’re good to go.
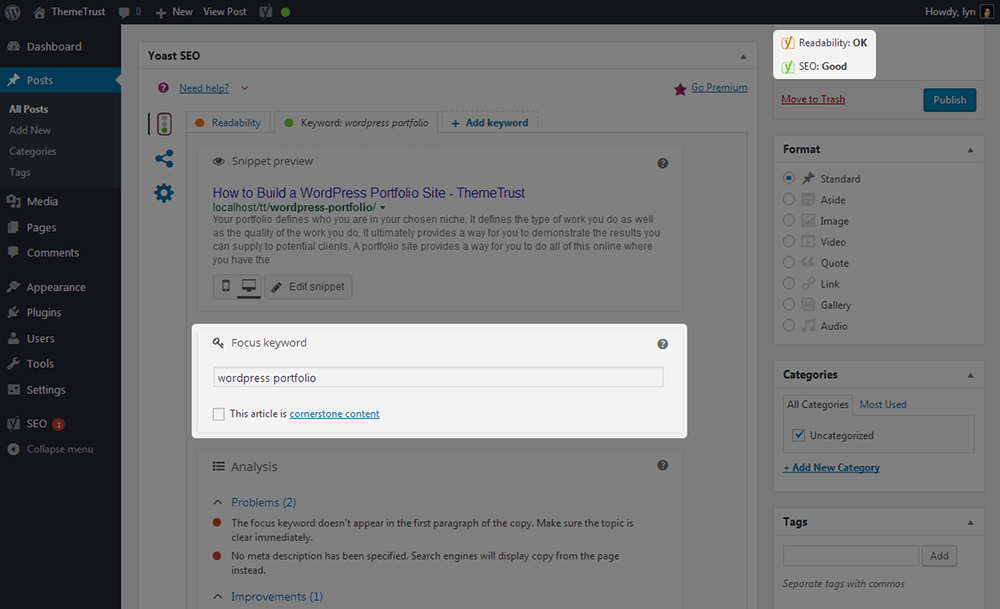
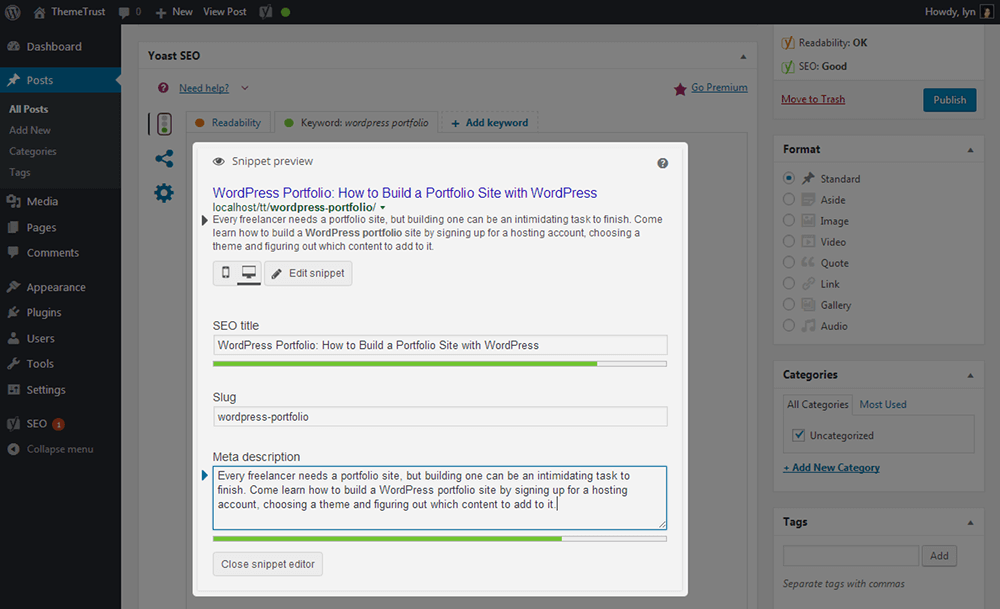
However, you should still see which improvements need to be made even if you have a green light. You can see the snippet preview grayed out in the screenshot above. It’s currently using the post title, post permalink and an excerpt from the beginning of the post, but we can change this. Click Edit Snippet, and follow Yoast’s character limit guidelines to add an optimized title, permalink and meta description.
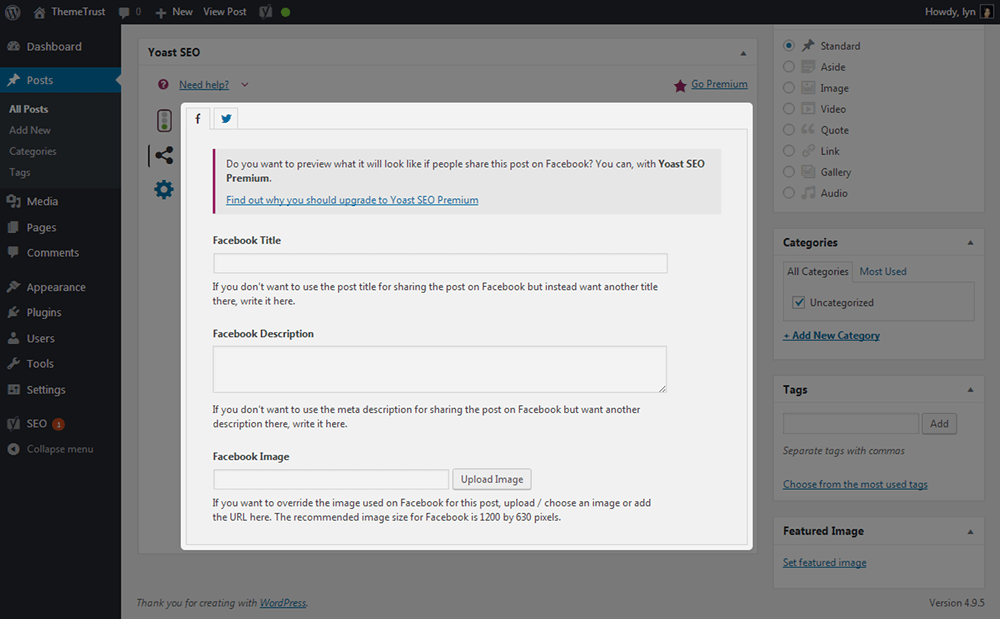
You can also control how this post’s preview appears on Facebook and Twitter.
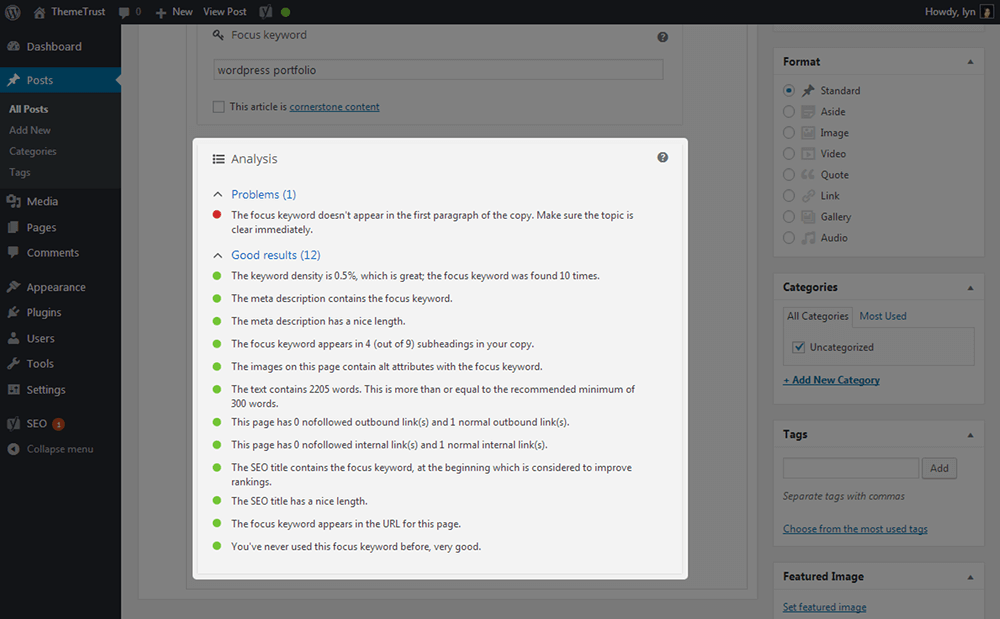
Now, if I scroll down to the Analysis section, I can see the improvements I need to make. My post only has one issue, but you can see which factors this plugin takes into consideration for on-page SEO by viewing the items in the Good Results list.
I have an orange light as my readability score. If I click over to the Readability tab, you’ll find out why.
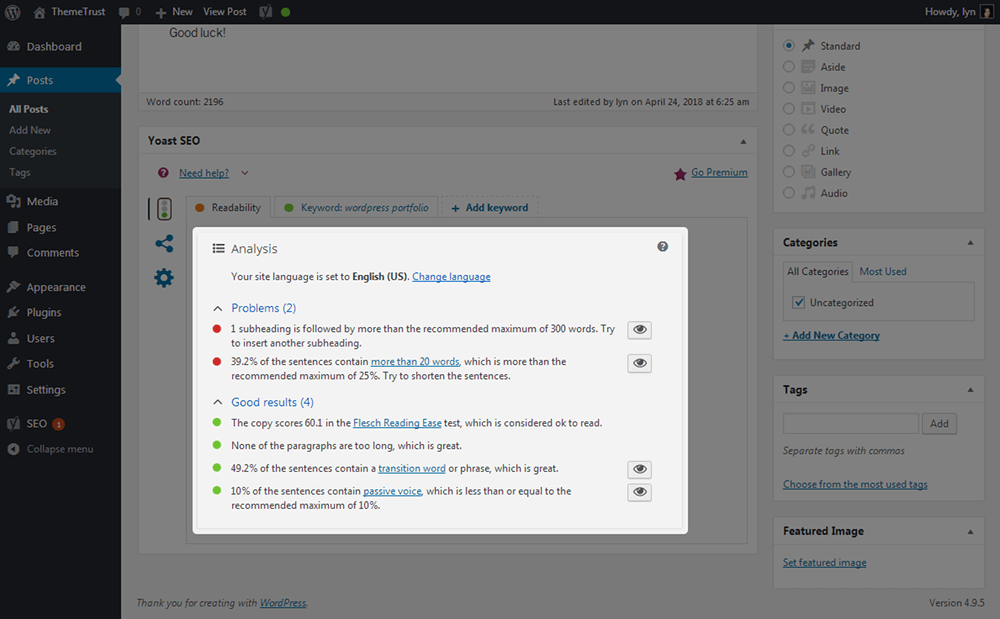
Both of these issues can be fixed easily.
Final Thoughts
As you can see, Yoast SEO is an intuitive plugin that helps you optimize your site for SEO by allowing you to give your posts title tags and meta descriptions, helping you target keywords without violating Google’s rules, helping you monitor crawl errors with Google Search Console, and more.
I mentioned this earlier, but it’s becoming commonplace to target multiple keywords that are synonymous with your primary keyword. Keyword stuffing, that is, having a keyword density higher than 1%, is a surefire way of receiving penalties from Google. Synonyms allow you to use your primary keyword less by replacing them with a similar phrase.
Fortunately, Yoast Premium allows you to optimize your content for as many as five keywords. It comes with a suite of advanced features and costs $89/year. With that said, I hope this post made optimizing WordPress SEO with Yoast a lot simpler. If you need additional help with SEO, check out the following posts: