")
Google Analytics is an important tool for any website owner. Whether you’re running an eCommerce store, you’re a small business owner, or you’re a part-time blogger, you need to know how much traffic you’re getting to your website and how those visitors are interacting with your site.
But for beginners who might be a little lost when it comes to the technical side of building a website, don’t worry! We’re going to walk you through how to install Google Analytics in your WordPress site — step by step — so that you can get to know all about your website visitors.
What is Google Analytics?
Before we get started with the step-by-step guide, first let’s cover the basics of what Google Analytics is. Google Analytics is a free web analytics tool offered by Google to help you analyze your website traffic. Basically, with Google Analytics, you can see how many visitors your website is getting, where that traffic is coming from, how long they stay on your website, what pages they visit the most, and more.
Google Analytics works by adding a piece of tracking code to your website that you receive once you sign up for an account. The tracking code is added to every page of your website and it’s invisible to users. Anytime someone visits your website, the tracking code recognizes them and records their activity on your site and reports it back to you.
Not only does it track and report basic website engagement like number of visitors and most popular pages but it also offers a number of other powerful tracking measurements like ads tracking, online forms tracking, events tracking, enhanced eCommerce tracking, and more.
Why Your Website Needs Google Analytics
Now that you know what Google Analytics is, you might still be wondering why you need it at all. Well, tracking your website traffic with Google Analytics provides you with a number of benefits that can boost your website traffic, increase engagement, and grow your sales including:
- Better Audience Insight – With Google Analytics you can really get to know your audience better. Google Analytics can tell you how your visitors discovered your website, whether it’s via social media or organic search, how your visitors are viewing your website, either by desktop, mobile or tablet, and even demographics like geographic location and interests. You can use this information to understand where to focus your marketing efforts and create more personalized email marketing messages that your audience will better connect with.
- Understand Interaction – Using Google Analytics you can also discover how to make your website more effective. You can see what pages and content is most popular with your audience and which is least popular. You can then use that information to come up with new ideas to increase engagement on your website and you can determine what content works best to convert visitors into customers and start doing more of the same.
Now that you know why having Google Analytics is so beneficial, let’s dive into the step-by-step guide for how to install Google Analytics in WordPress.
Sign up with Google Analytics
Before you install Google Analytics on your website, you need to sign up for the service. As we previously mentioned, Google Analytics is free, so just head over to Google Analytics and click on the Start for free button.

Once you click on the button, you’ll be prompted to sign in to your Google/Gmail account or create a new one.
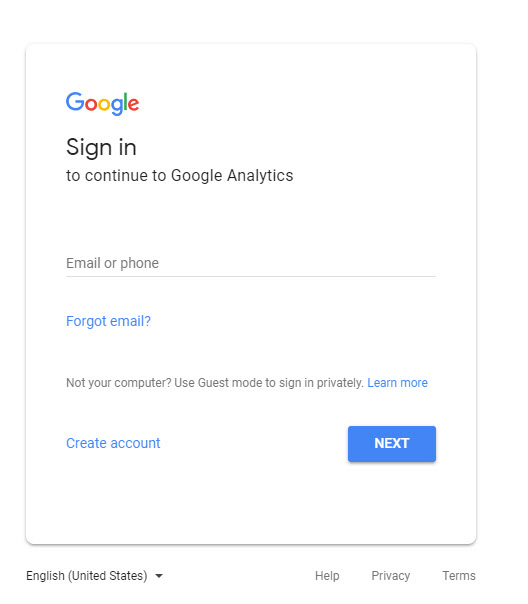
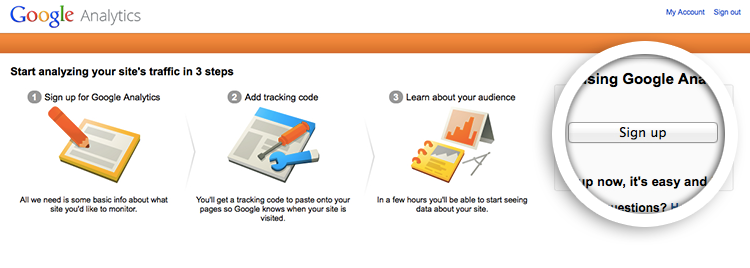
Once you’ve signed in with your Google account, you can now sign up for Google Analytics. Click on the Sign up button on the right to get started.
Configure Google Analytics
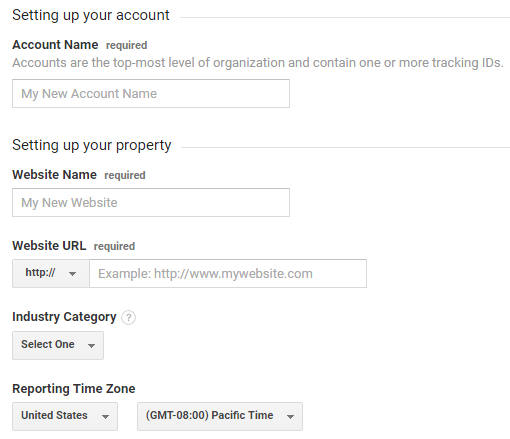
Next you’ll be given the choice of whether you want to track a website or mobile app. If you want to track your website traffic, make sure you click on the Website option.

After you’ve chosen the option for Website, fill in all of your information in the fields provided including your website name and URL, industry, time zone, etc.
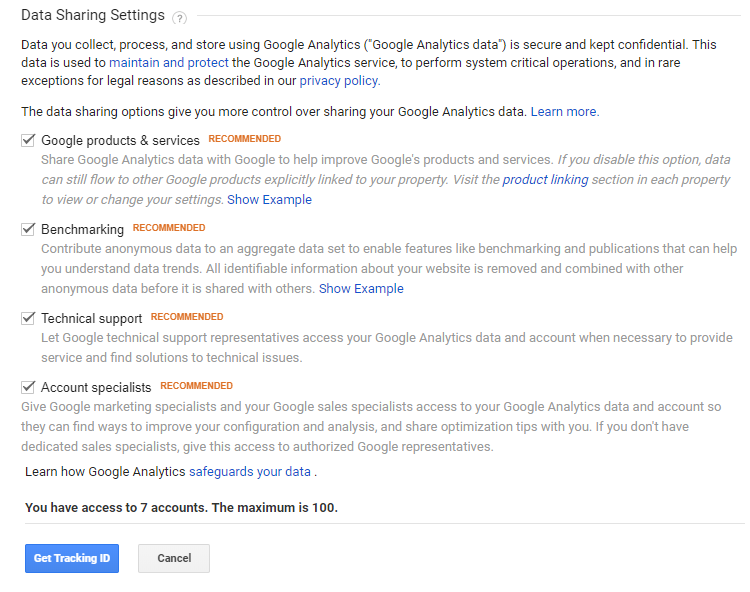
After you’ve filled in all of the required fields, scroll down and customize your data sharing settings, Google recommends you enable all of the settings. At the bottom of this screen there’s a button called Get Tracking ID, click it to continue to the final step.
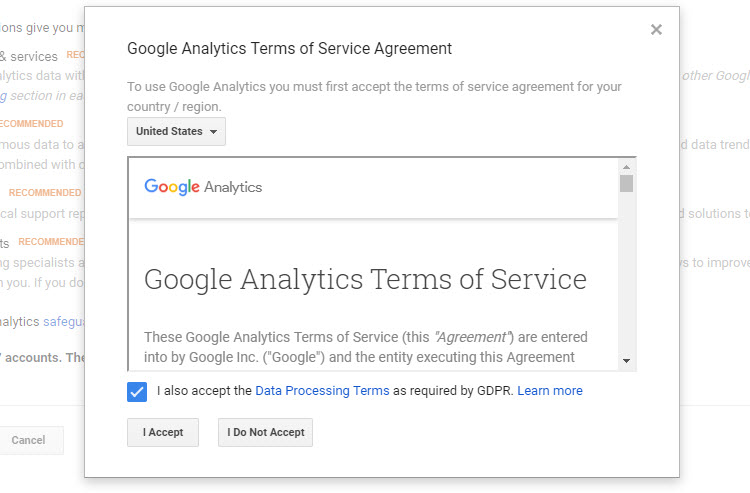
Then another window will pop up that asks you review and accept the terms of service. After you’re finished reviewing the terms, click I Accept.
That’s it! Now you are signed up for a Google Analytics account.
Chose a Method for Installing Google Analytics
The next step is to install Google Analytics on your WordPress website so it can start tracking activity on your site. Now, Google Analytics will give you a tracking ID in the form of a piece of code that you can add to your WordPress website, but this is not the method we recommend.
When you copy and paste your tracking ID code into the header and footer or in the theme of your WordPress site, you aren’t able to track your activity from your WordPress dashboard; you’ll actually have to sign in to Google Analytics every time, which is really inconvenient. That’s why we recommend using MonsterInsights.

MonsterInsights is the best Google Analytics plugin for WordPress and it’s super easy to install. With MonsterInsights you can view your analytics reports from right inside your WordPress dashboard.
Plus, if you want to get access to the more powerful tracking features we mentioned before like ads tracking and online form tracking, you’ll have to manually customize the code for each instance. Which is a really difficult task for beginners as well as being time-consuming. But with MonsterInsights you can enable enhanced tracking features with just a couple clicks, you’ll never have to touch a line of code.
So, let’s use MonsterInsights to set up Google Analytics on your WordPress site. But don’t worry, we’ll also show you the alternative of installing Google Analytics on your site by copy and pasting the tracking code.
Install Google Analytics on Your WordPress Site with MonsterInsights (Recommended Method)
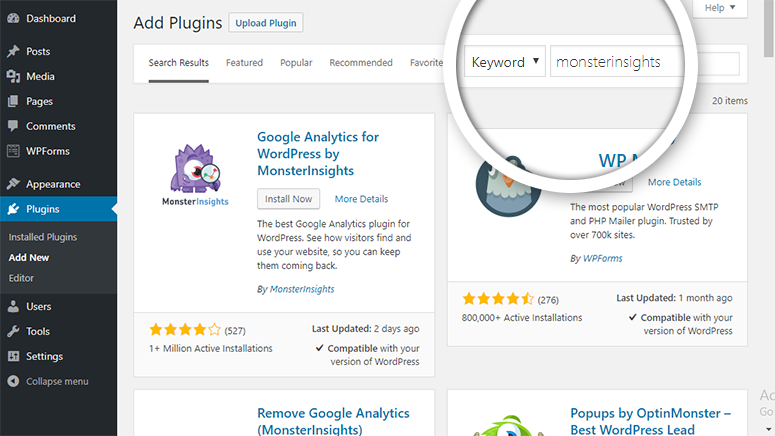
MonsterInsights offers a number of different plans depending on your needs. Sign up for MonsterInsights, choose the plan that’s right for you, and download the plugin. If you’re just starting out and your budget is tight, you can also get started with MonsterInsights for free with their MonsterInsights Lite plugin. To do that, go to Plugins on the right side of your WordPress dashboard, and then to Add New. Search for MonsterInsights in the search bar and once the plugin appears, click Install Now, and then Activate.
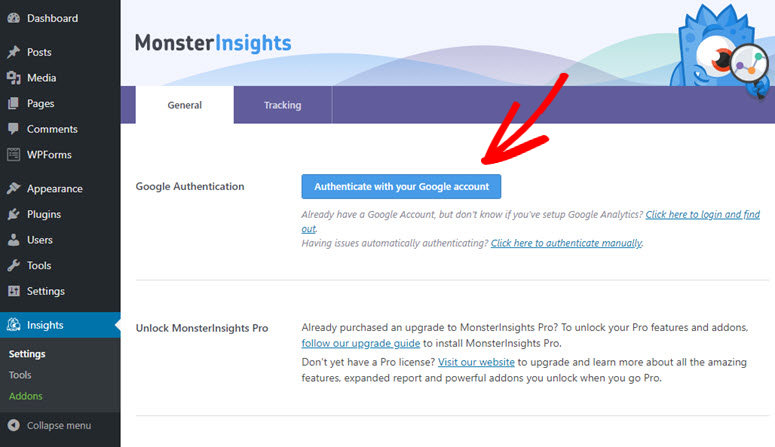
Once the plugin is downloaded and activated, click on Insights, then Settings to authenticate Google Analytics with your website by clicking the Authenticate with your Google account button.
You’ll then be prompted again to chose/sign in to your Google account. After you choose your Google account, a window will pop up asking for permission for MonsterInsights to manage your account. Click Accept.

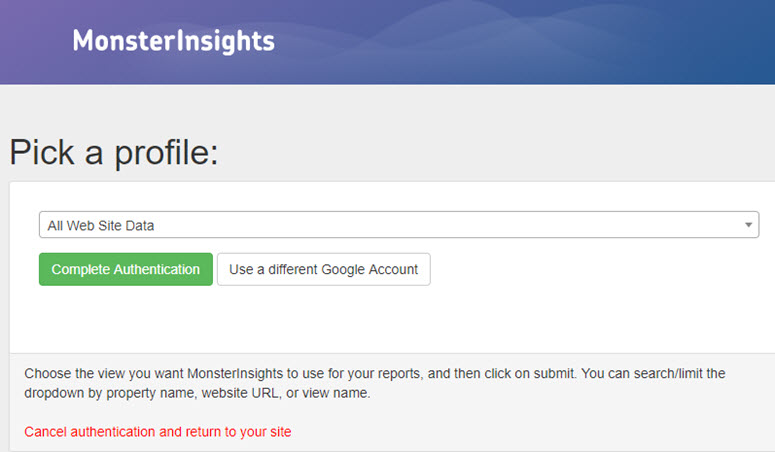
Finally, all you have to do is select your website and click Complete Authentication.
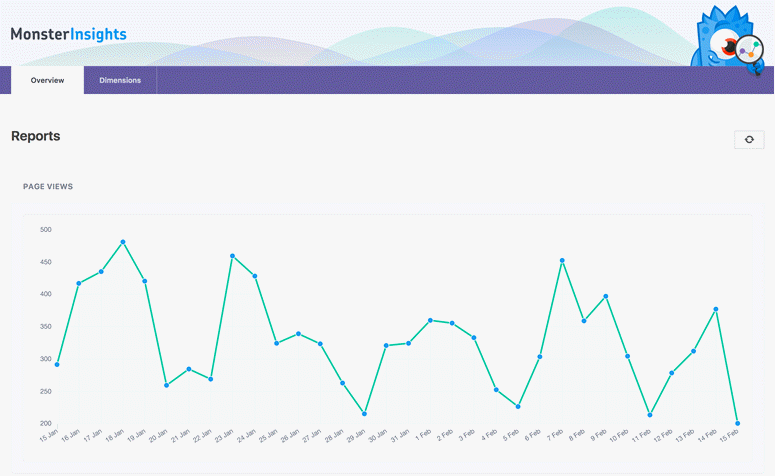
Voila! Now you can easily view reports on your website traffic and analytics from right inside your WordPress dashboard by clicking on Insights, then Reports. All the reports look great and are super easy to understand.
Start Tracking Your Website Visitors Now
With Google Analytics and MonsterInsights, you’ll be able to easily keep an eye on your website traffic 24/7. With accurate and easy-to-understand reports, your analytics will no longer be a mystery to you; you can use the information you collect to improve your website and user experience, improve your marketing strategies, and make more sales.

Syed Balkhi is an award-winning entrepreneur and online marketing expert. He is the co-founder of OptinMonster, WPBeginner, MonsterInsights, WPForms, and SeedProd.