The WordPress Theme Customizer (also referred to as the “Customizer”) feature gives developers the ability to customize the appearance of their theme, and even help them preview the changes made to the theme in real time. In today’s era, where the race to attract customers towards a website is intensifying, you’ll often feel the need to customize your website design. And thanks, to the theme customizer, you can save a lot of your valuable time by live-previewing changes made to your WordPress design.

The WordPress theme customizer was introduced as part of the Theme Customization API (that was introduced in WordPress version 3.4. If you want to make changes to your theme settings, then you’ll need to make use of custom controls that comes shipped with the theme customizer like a checkbox, text field, radio and a few others. But, what if you would like to add your own custom controls to your WordPress theme?
To help you understand how you can create and add controls tailored to meet your specific needs, we’ll demonstrate creating three custom controls to make a few changes to our theme’s footer. However, to begin with the process, you’ll first need to become familiar with the WP_Customizer_Control class.
Getting to Know About “WP_Customizer_Control” Class
In order to generate a custom control, you need to create a new class and extend it using the WP_Customizer_Control class. This class uses the “$wp_customize->add_control()” method to add your own custom control to your WordPress site theme customization screen. Furthermore, in order to access this method, you need to use the $wp_customize object available in the action hook: customize_register.
Let’s consider an example that illustrates how you can add an existing custom control to your theme section (in the ‘customize_register’ action hook) as follows:
$wp_customize->add_control( new WP_Customize_Header_Image_
In the above example, we’re creating a control that will give users the ability to choose a new header image.
Examples Demonstrating: How to Create More Custom Controls?
This section is divided into three different steps, wherein each step contains code that will generate a custom control for the text area for your theme customizer. We’ll add the code in WordPress theme’s footer.php file, so as to make changes to the footer via the new text area controls.
Step1: Creating a Simple Text Area Control
As we’ve discussed above, in order to create a new custom control, we need to define a class that will be used for extending the WP_Customize_Control class. Essentially, this class is used together with the WordPress Theme Customization API for adding an input control (i.e. custom control) on the theme customization screen. Let’s look at the code to implement this task:
/*Customizer Code HERE*/
add_action('customize_
In this code, the customer_register action hook is used to tell WordPress about the custom function, we’ve created with the name: theme_footer_customizer. As you may know, that the WP_Customize_Manager class helps to control WordPress Theme Customizer, and so the custom control will become a part of this class. However, to access your control, you’ll need to use “wp_customize” object that is an instance of the customize_register hook.
In our case, the wp_customize object is used to define a new footer section that will be included in the text area. So, whatever you’ll type in the footer section “text area” will get displayed in your theme’s footer as shown in the screen shot below:
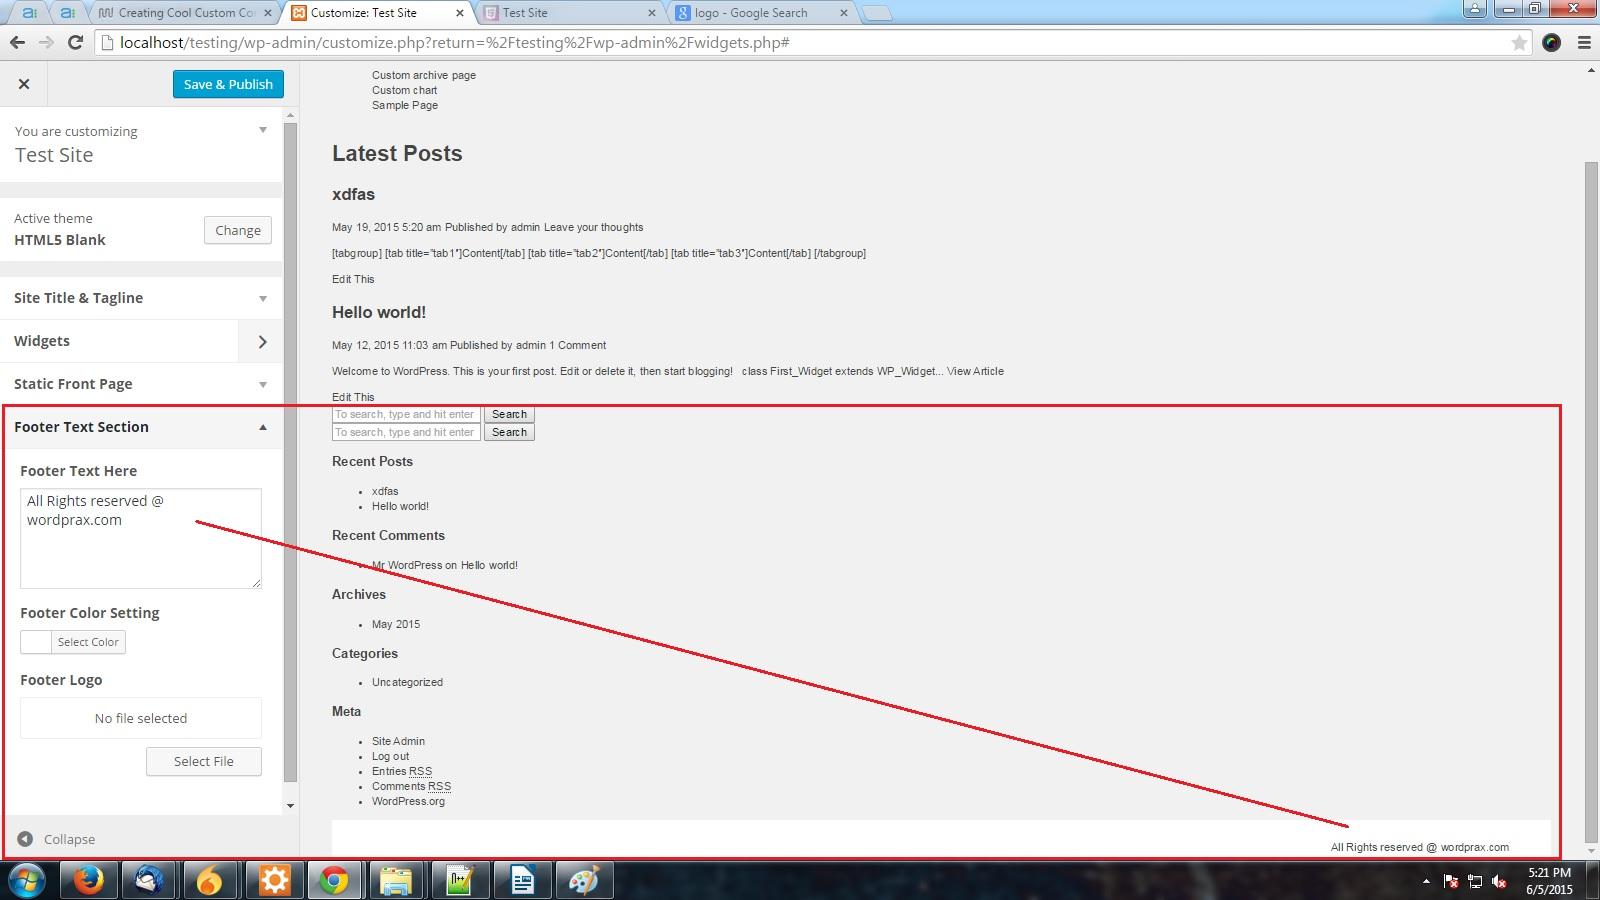
In this screen shot, you can see that a new “Footer Text section” is added to your theme. The text written in this section will get displayed in your theme’s footer.
Step 2: Adding Custom Control to Change Background Color
So, now that we have created a text area control, you can add many different custom controls to it. In this example, we’ll be adding a custom control to our new Footer text section that will help in changing the background color of the footer. To do so, simply add the following code snippet in your theme’s footer.php file:
//adding setting for background
$wp_customize->add_setting('

As you can in the screen shot above, choosing an appropriate color from the “Footer Color Setting”, the background-color of the footer has changed to gray.
Step 3: Adding Custom Control to Add Logo
Another control that we’re adding to the Footer text section is “Footer Logo”. As the name implies, the ‘Footer Logo’ control will help in adding a logo the footer. To add this control, you’ll need to include the below code snippet in the footer.php file:
//adding setting for footer logo
$wp_customize->add_setting('

Let’s Wrap Up!
You may find the process of creating custom controls a bit time-consuming. But, you cannot neglect the fact that the better controls you’ll add to your website theme customization screen, the more time of your users can be saved, thereby leading to enhanced user experience. So, if you plan on building some custom controls on your own to be added to the WordPress theme customizer, then this post will prove a resourceful guide for you.
Sophia Phillips has been working as a professional in WordPress website development company and loves sharing information about leveraging multiple benefits of WordPress CMS in the best possible manner. Currently, she has an impressive count of WordPress development-related articles under her name.