Want to add custom fonts in WordPress? If you had asked about this just a couple of years ago, you would have been very unhappy with the answer. But since it is 2016, we’re pleased to report that now you have more possibilities to use custom fonts in WordPress than you can shake a stick at.
In this post, I’m going to explore and explain the easiest way of integrating custom fonts with your WordPress website.
Note. No coding skills required. The whole thing takes 3-5 minutes.
But first:
What’s the deal with custom fonts in WordPress anyway?
In case you don’t know, adding custom fonts in WordPress is somewhat of a new possibility in the world of website building.
Not that long ago, site owners could only work with a narrow set of “web safe” fonts. Those were the fonts that rendered correctly on most computers and in most web browsers.
You simply couldn’t use any custom fonts, because your visitors’ machines literally didn’t know how to display them on the screen.
Ugh!
This all changed when custom type kits were popularized and integrated through handy code snippet embeds. Because of that, every WordPress website owner can now work with completely custom fonts, and at the same time, be sure that those fonts will render correctly across all screen sizes and devices.
Here’s the most popular and easiest way of enabling custom fonts in your WordPress website:
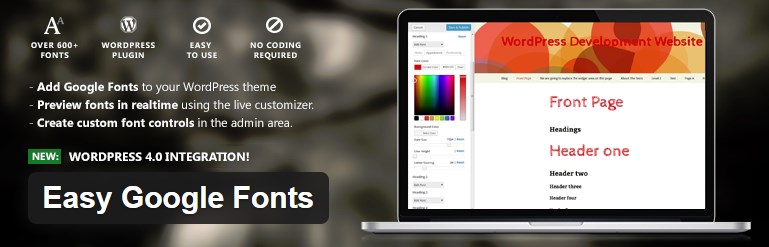
Adding custom fonts in WordPress through Google Fonts
Google Fonts is a huge library of 700+ fonts (and growing), that’s available to all website developers for free.
The great thing about Google’s library is that the fonts are neatly categorized, which makes finding the perfect one for your project a breeze. Plus, there’s a free WordPress plugin available that’s going to make things even simpler.
Here’s what you do:
Getting the Easy Google Fonts plugin
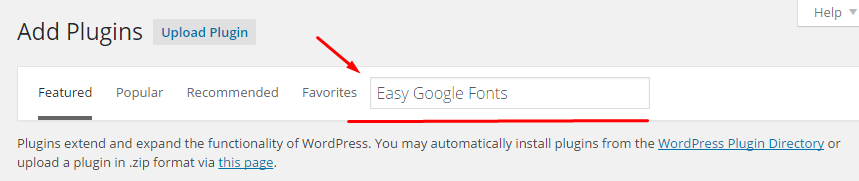
Start by getting a free WordPress plugin called Easy Google Fonts.
Just install it normally via Plugins / Add New in your wp-admin panel. Just type in the plugin’s name:
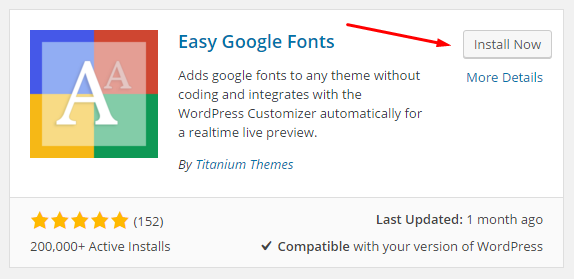
After activating the plugin, the hard part of the task is basically done! At this point, you can start working with all of Google’s massive font library.
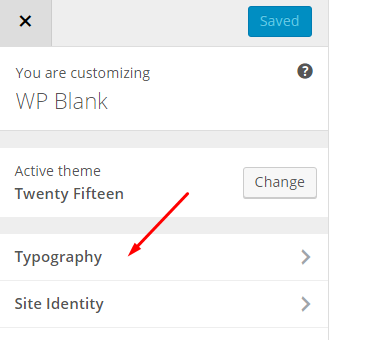
Setting up custom fonts in your WordPress site
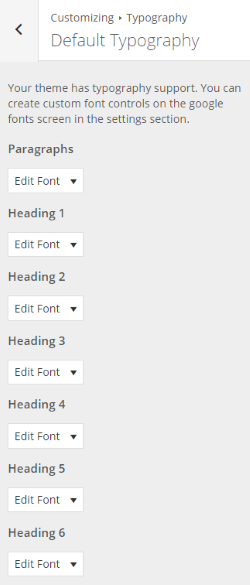
Just go to the WordPress Customizer (Appearance / Customize in the wp-admin). There, you’ll find the Typography section:
By default, you can work with paragraphs and headings 1 to 6:
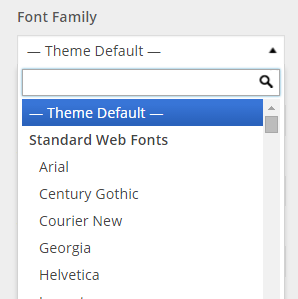
The usage is really simple. Let’s work with Heading 3 for a quick demo.
Just expand the Edit Font button under Heading 3, and then select your new font from the Font Family list:
Now, what you see there is a text list of font names that doesn’t give you much of an insight into what the actual font looks like. For that, hop over to www.google.com/fonts. As I mentioned before, the directory there is very nicely organized, and you can see font demos next to their names.
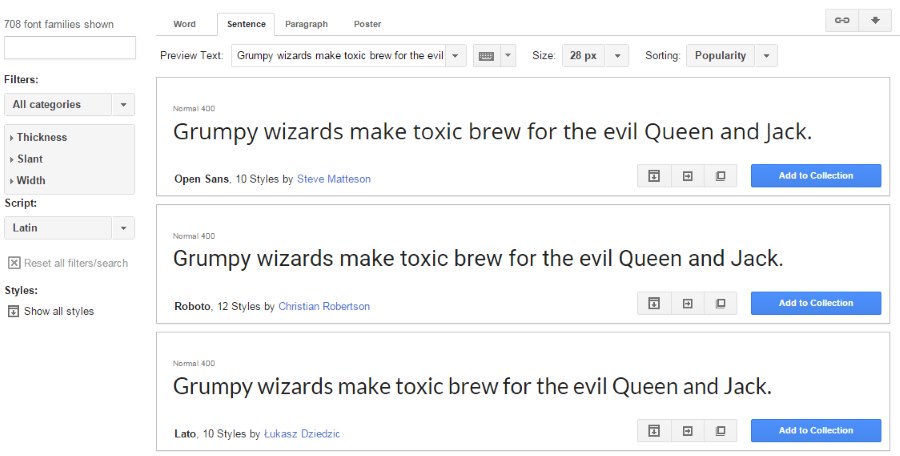
In short, I advise you to pick your fonts in Google’s own interface, then come back to the plugin, and input the names of those fonts into the field. This will enable your new custom fonts in WordPress.
In my case, I like a font called Lobster for my Heading 3:

As soon as I put the font’s name in the field, I will see the changes in real time:

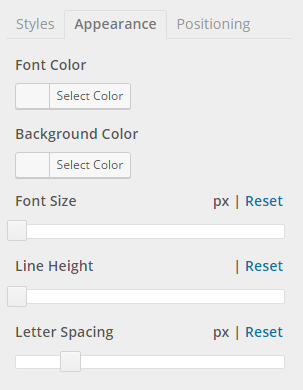
For more adjustments, I can go to the Appearance tab. There, I can adjust things like: font size, line height, font color, background color, and even letter spacing. Fun stuff.
After I’m done with Heading 3, I can adjust the other headings and the main paragraphs.
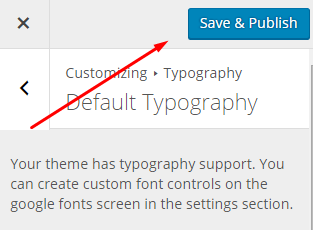
The great thing here is that whatever you do in the Customizer, won’t go live on the site until you click the main Save & Publish button at the top:
Setting additional types of website text
Apart from the paragraphs and the headings, you probably also use other kinds of text on your WordPress site. I’m talking about things like block quotes, or lists. Those you can set with the plugin as well, but with one additional step.
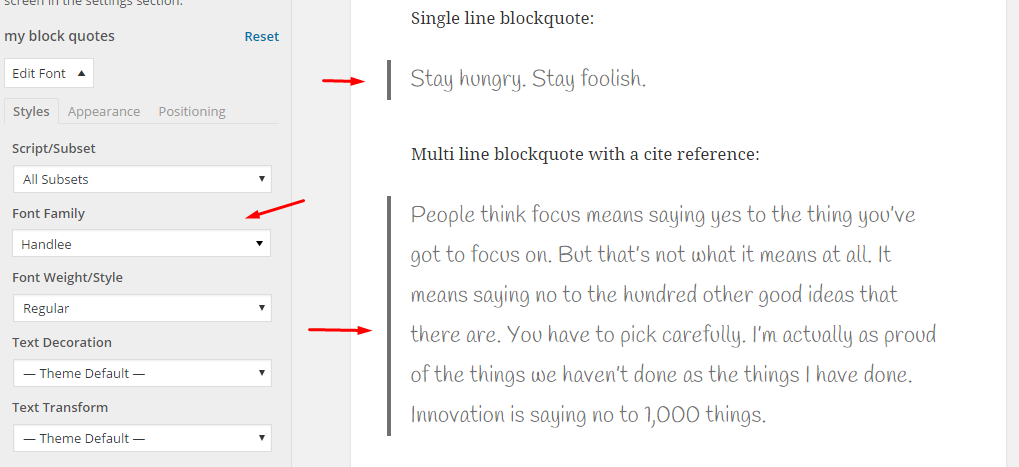
Go to Settings / Google Fonts. Once there, create what’s called a new Control. I recommend to use Control names that reflect the text you’re going to be adjusting. For instance, I want to adjust my block quotes, so my Control will be:
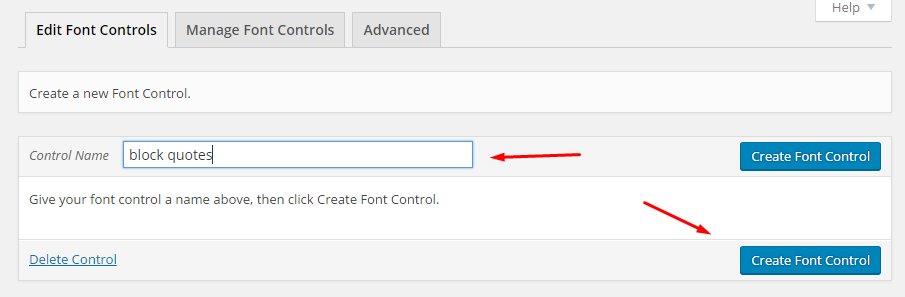
Next, in the “Add CSS Selectors” section, I have to add the text selector name that I want to adjust.
This is the only confusing part about working with the plugin, so here’s a cheat sheet of what you can input there:
- use
blockquotefor block quotes, - use
lifor individual list elements.
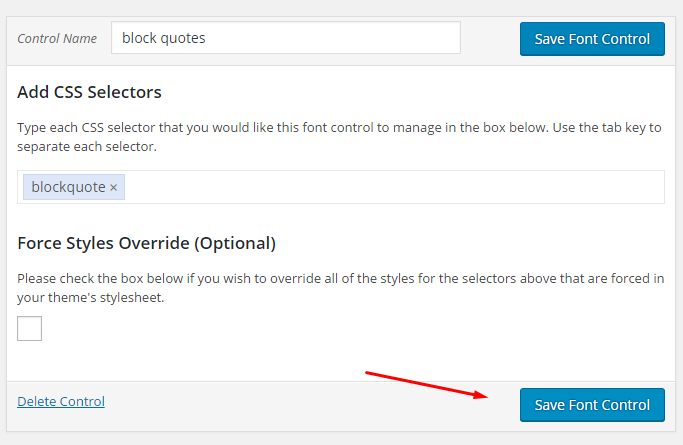
Once you click Save Font Control, the plugin will enable a new section in the WordPress Customizer, which will allow you to adjust this new type of text.
Let’s come back to the Customizer. Again, go to the Typography section. Now there’s a new block there:
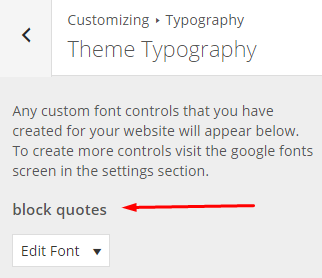
Through it, you can set some new text parameters:
Conclusion
Adding custom fonts in WordPress sure is easy with Google Fonts, but I just want to warn you about one small thing.
Generally, it’s not recommended to have more than 2-3 different fonts on your site. Going for more than that can result is slower loading times of your whole website, and this has a negative impact on user experience.
So be careful here. In most cases, having just 2 awesome fonts will do the trick – one font for headings and the other for paragraphs.