
Ah, yes, the WordPress login page – one of the most recognizable pages in WordPress – isn’t it?

But at the same time, having this page on your WordPress site in its default form is not always the best of ideas.
Why? – you ask.
Here’s the answer:
Why would you need a custom-made WordPress login page?
The issue is three-fold:
- Traffic. The more traffic you get, the more “bad” traffic you get as a direct result. By bad traffic I mean malicious scripts and bots, spammers, and all sorts of users coming to your site with bad intentions. Customizing your WordPress login page can make your site more secure.
- Multi-user site. If your site is managed by multiple people – be it administrators or authors/bloggers – multiple occurrences of logging in will take place. Providing a custom login form will make the process more pleasant overall.
- Branding. The default login page is all good, but there’s the big WordPress logo right in the middle. Switching this and making the login page look more like your own can be a nice branding touch. This is especially valid if you’re building a website for a client. Providing your client with a consistent experience is surely something they will appreciate.
If any of the above sounds compelling to you, you should consider switching your login page to a custom one. Here’s how:
How to create a custom-made WordPress login page
There are two main ways you can go about it:
- the manual way,
- the plugin way.
Both ways have their pros and cons. The manual way gives you more control over the appearance of the final page. The plugin way is easier to follow, especially if you don’t have any coding skills, but you have to settle with what the plugin allows you to do.
Let’s cover both.
Creating a custom login page manually
Although this requires you to tweak some of your theme’s source files, it’s nothing that difficult. I’m going to use Twenty Fifteen as my example here.
The fun starts by creating a copy of the page.php file and the content-page.php file.
Rename those new copies to page-login.php and content-login.php respectively.
Open page-login.php and change just one line. From this:
get_template_part( 'content', 'page' );To this:
get_template_part( 'content', 'login' );Now, let’s edit content-login.php and add one line right beneath <?php the_content(); ?>. Like so:
<?php the_content(); ?>
<?php wp_login_form( array('redirect' => home_url()) ); ?>
<?php wp_link_pages( array( ...
Note. At this stage, you can perform a range of other customizations if you wish to (like adjusting the design/layout, removing the sidebar), but it’s all optional. Changing just those two lines will do the job if you’re going for an extremely minimal approach with your new WordPress login page.
Now, let’s create a new page in the wp-admin and simply call it “login”. Make sure that the permalink is “login” as well:
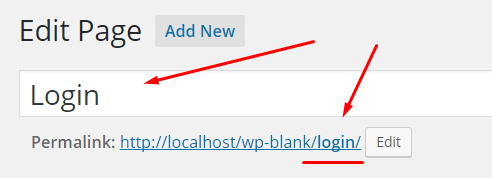
Doing this will ensure that WordPress uses your page-login.php template file automatically.
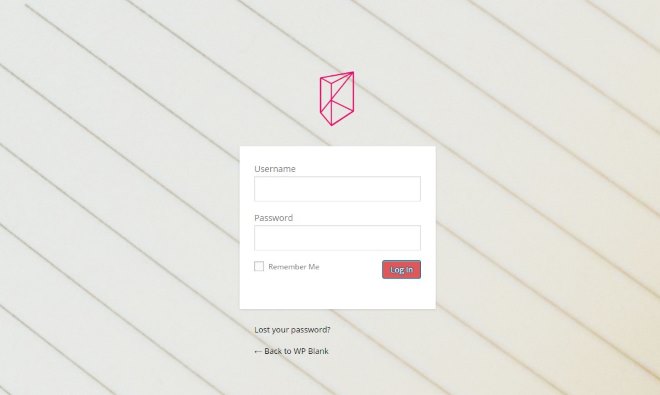
If you visit your new page right now, it should look a little like this:

At this stage, the only thing left to do is to set redirections to ultimately eliminate the default login page of WordPress. Do so by placing these lines at the end of your functions.php file:
/* Main redirection of the default login page */
function redirect_login_page() {
	$login_page  = home_url('/login/');
	$page_viewed = basename($_SERVER['REQUEST_URI']);

	if($page_viewed == "wp-login.php" && $_SERVER['REQUEST_METHOD'] == 'GET') {
		wp_redirect($login_page);
		exit;
	}
}
add_action('init','redirect_login_page');

/* Where to go if a login failed */
function custom_login_failed() {
	$login_page  = home_url('/login/');
	wp_redirect($login_page . '?login=failed');
	exit;
}
add_action('wp_login_failed', 'custom_login_failed');

/* Where to go if any of the fields were empty */
function verify_user_pass($user, $username, $password) {
	$login_page  = home_url('/login/');
	if($username == "" || $password == "") {
		wp_redirect($login_page . "?login=empty");
		exit;
	}
}
add_filter('authenticate', 'verify_user_pass', 1, 3);

/* What to do on logout */
function logout_redirect() {
	$login_page  = home_url('/login/');
	wp_redirect($login_page . "?login=false");
	exit;
}
add_action('wp_logout','logout_redirect');
(Code snippets built based on: [1][2].)
Right now, the only login page accessible is the new one created by you. The great thing here is that you can edit it freely through the WordPress’ default page editor (just like you’d edit any other page).
Creating a custom WordPress login page with a plugin
This method works a bit differently because instead of creating a completely new login page, we’re actually modifying the default one.
First, the plugin we’re going to be using is: Custom Login Page Customizer.

After installing and activating it, just go to Appearance > Login Customizer, where you can launch the customizer panel.
The options of this plugin are quite nice, and they allow you to adjust things like:
- Set a logo to appear instead of the default WordPress logo.
- Set a background for the whole login page.
- Set a background for the form itself.
- Adjust the styling of the form and every little detail about it (fonts, sizes, colors, fields).
- Install a security add-on to get an additional captcha field in the form (great to prevent spam logins / bots).
For example, just a couple of minutes of work with the plugin and I got this result:
Another Plugin Option
Another custom login page plugin worth taking a look at is: Login Designer. This plugin aims to make customizing the WordPress login page super easy while still giving you flexibility in the design.
One way it achieves ease of use is by making the customization process familiar. All options and tools are integrated right into the WordPress Customizer. So if you are use to using the Customizer for changing theme options, you’ll feel right at home.
Check out this video for an overview of how the plugin works.
Manual or via a plugin?
What’s your method of choice? Do you prefer to code things manually or have everything handled by a plugin? Feel free to share.