Using (a lot of) images on your WordPress blog has tremendous benefits.
And it’s not just me talking.
There are multiple studies available online that confirm this. Blog posts with images simply generate more social shares and more traffic than those without.
But there’s also a problem here…
Frankly, more images mean more web server bandwidth consumed by those images. And more bandwidth consumed means a slower website.
To put it in plain English, the more images you have on a single page, the longer that page will take to load. Bummer.
So what we’ll be doing today is finding a nice balance between using images on your blog and making your WordPress blog lightning fast! Here’s how to optimize images in WordPress:
1. Use an automatic image optimization plugin for WordPress
If you have a lot of images on your site, optimizing them one by one probably isn’t an option. This is especially true for blogs. For that, you’re better off with a dedicated image optimization plugin that works on autopilot.
![]()
The plugin is called Short Pixel. The ShortPixel plugin installs directly into your WordPress Dashboard. There you can easily manage the image reduction process. Images are automatically optimized and saved. You can configure the ShortPixel plugin to compress past images and optimize your website history.
2. Optimize your website design graphics / theme graphics
Here’s the thing. Your current site design uses a lot of graphics that are loaded automatically on every page. Those are things like your site logo, the background, the footer and sidebar graphics if you have any.
If you do not have a ton of images on your site, you can optimize them individually with an image compressor.
Even shaving a couple of kilobytes off each of those graphics quickly adds up over hundreds or thousands of page views. To optimize them, simply take the graphics to a tool like PunyPNG.
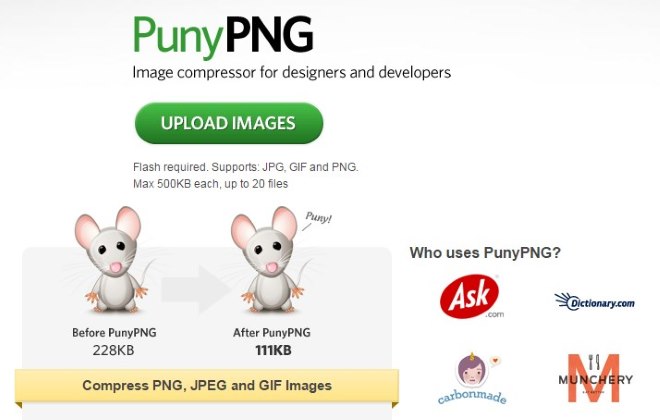
The magic of PunyPNG is all about processing your image and reducing its disk size without lowering the visible quality of the image. After PunyPNG is done, simply upload the images back to your site and set those new versions as the logo, background, or whatever else.
3. Don’t use images bigger than necessary
For example, if the width of your main content block is 660px (like it is here on ThemeTrust), then there’s no reason to upload images bigger than that.
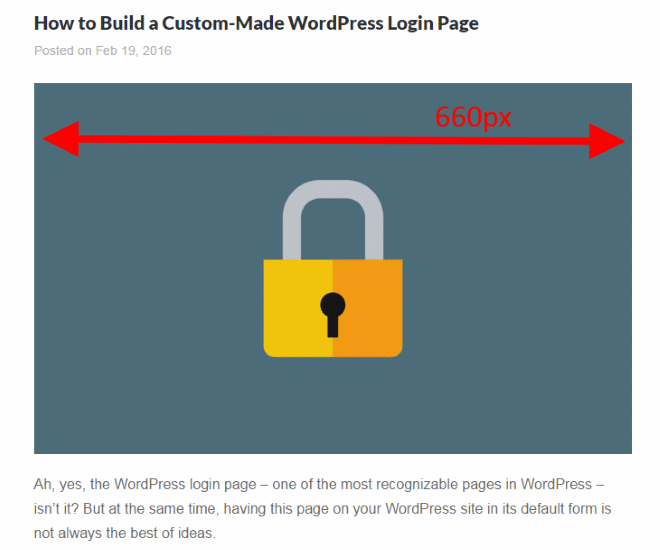
Even though WordPress is ready to deal with images of any size, huge images take up a lot of bandwidth. For example, a 2500px image can take up even 1 MB of disk space. The same image, but 660px is only 100 KB.
The solution is to always resize every image you intend to use in a blog post. This is quite easy to do in WordPress. Here’s how to optimize any image in WordPress:
After you upload an image, click the “Edit Image” link:

Then, set the new dimensions, and click “Scale”:
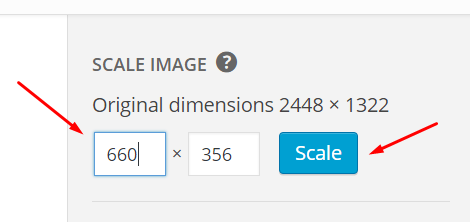
And then just insert it in a post normally.
4. Don’t forget about SEO
There are three important parameters of any image when it comes to WordPress image optimization for SEO:
- the file name,
- the “alt” tag,
- the “title” tag.
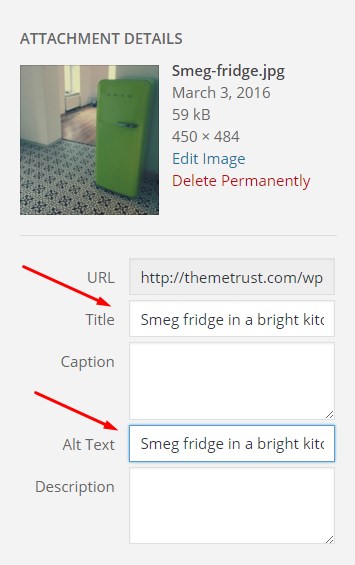
Every file you use should have a descriptive file name. This way, it helps Google to decode what the image is about. For example, if I want to use a picture like this:
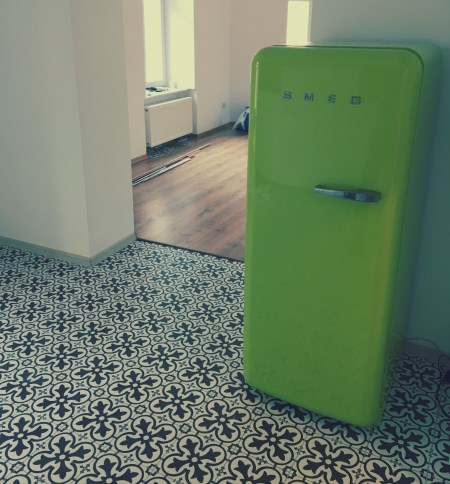
I could call it img284634j.jpg. However, it’s a much better practice to call it something like Smeg-fridge.jpg.
The “alt” and “title” tags have similar significance for Google’s ability to work with your image. A good practice is to use those tags to describe what’s in the picture, in a short and concise way.
For my example image above, I could make the “alt” and “title” tags, “Smeg fridge in a bright kitchen.”
You can do this easily in WordPress:
5. Optimize your images for social media
Whenever a visitor shares your post to their social media followers, you can have a specific image associated with that share, and thus have it displayed alongside. Here’s an example of an “upgraded” social share like that:
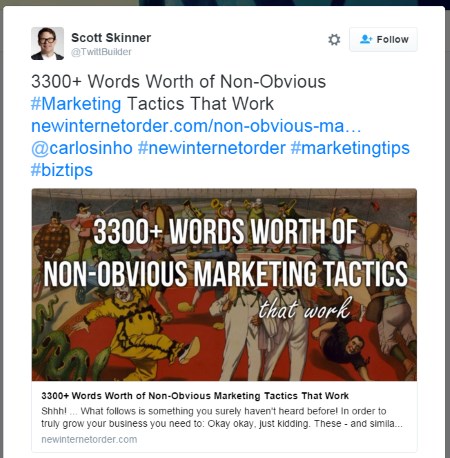
You can achieve this effect with a plugin called WPSSO. The configuration is quite simple, and you can hand-pick specific images and assign them to your blog posts. Those images will then be used when people share your content on social media.
Are your images optimized?
Be honest here, have you done everything you can to optimize the images on your WordPress blog?